Thursday, January 31, 2019

Dreaming Of Spring


On the FaceBook Group, Tim Holtz Addicts, they've begun a monthly challenge that focuses on one of the '12 Tags...' series that Tim used to do.  The technique chosen for January's challenge is to use Tissue Wrap. Since Tissue Wrap is discontinued, Collage Paper is also acceptable.  I've used both for my tag.  I've have step out pictures that mostly speak for themselves so I'll just add where I think it might be needed.  If you have a question, just ask in a comment or email me.  I'd be happy to answer.


Composer Tissue Wrap on a #10 manila tag.


Distress Paint - while wet lay a stencil over it - wipe with a baby wipe or damp cloth to remove paint.


Dry each layer before adding the next.


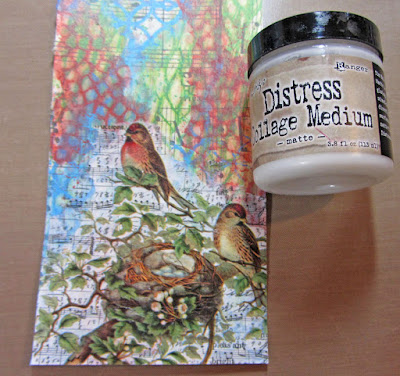
Since the Collage Paper goes clear where there is no printing I put white paint where I was going to glue it on.


I decided to mute the color between the two collage paper areas by adding the Picket Fence paint lightly.


This paper doll is from the Christmas pack. 


The lid from an empty Collage Medium bottle was used to "stamp" the circles.  First with Hickory Smoke but I decided it wasn't dark enough and repeated with Black Soot offsetting the circles slightly.


Border stamping using Archival Ink Jet Black.


I die cut the letters from white cardstock and then decided they should be black.  I painted them with Black Soot and actually like that better than I could have liked black cardstock.  Highlights added with a white gel pen. 


A typed token - Hope highlighted using Distress Crayon.  An index clip at the top.  A small talk sticker and the green is Distress Marker.


It's been an arctic blast here in Southern Iowa.  The coldest in like 40 years.  I'm looking forward to Spring :-)

Hugs, Wanda

Wednesday, January 30, 2019

A Way With Words New Release Group Post


Inspiration abounds today for the new A Way With Words release.  There is a  group post on the Elizabeth Craft Designs Blog you can find HERE.  


I'm sharing this card that uses the new set, My Garden Flowers (QF / ECD), combined with the Long Stem Rose (QF / ECD) and a stamp from the Where Flowers Bloom Collection (QF / ECD).


My background is very simply watery paint brayered on White Soft Finish Cardstock and then some splatters of the same paint.  I stamped the leafy image along the bottom after the flowers were all glued on.  It was an added thought because I thought it needed something along there. 

The flowers and the words were die cut from White Soft Finish Cardstock.  The words and stems were inked with Distress Ink.


The flower outline pieces were inked with Embossing Ink and embossed with the powders you see.


The solid pieces were inked with Distress Oxide Ink sometimes combining 2 colors to get a match to the embossing powder I'd chosen.  


Some doodling for a border and then the panel was attached to a folded yellow card.  When I glued the flowers on I left the stems long and then trimmed them even with the card after it was put together.


This was a fun (and colorful) card to make and really brought some sunshine during this cold, snowy winter.

Hugs, Wanda

Wednesday, January 23, 2019

Bliss


Hello.  I have all the details of this card on the Elizabeth Craft Designs blog today.  You can find it HERE.


Tuesday, January 22, 2019

Just For You


I'm sharing all the details of this card on the Quietfire Creations Blog today.  I hope you have time to check it out!!  

Hugs, Wanda


Monday, January 21, 2019

Notes


Today is Release Day for the A Way With Words brand new cutting dies!!!  You can find them on the Elizabeth Craft Designs site, on the Quietfire site, and hopefully soon in your local stamp store.

I'm sharing a note card today using the Notes set of dies.  I'm thinking how wonderful it would be to actually have this design in a notepad.  Wouldn't that be fun and colorful!!!


For my background color I've brayered PaperArtsy's Fresco Finish Chalk Paints (Zesty Zing and South Pacific) adding a bit more brayering with South Pacific to the edges.  The stamping around the edges using a stamp from the set, Where Flowers Bloom, is also done with South Pacific.

I die cut all the pieces from a white cardstock and painted them with South Pacific.  I also cut Notes again from white and then from yellow gluing and layering them as shown.  The black lines were made with paint using a junk plastic card. 


Wednesday, January 16, 2019

Once Upon A Time


Hello!!!!  Today's project doesn't use one of the new release dies but I had fun making it anyway!!   You can find details about the new A Way With Words release coming up in THIS post and I'll share a picture of the whole release again.  You can find all the new dies in THIS pre-order release category on the Quietfire Design Website.


This was a fun panel to make!!!!  My base is a piece of heavy watercolor paper.  I die cut one of the designs from the Elizabeth Craft Designs Planner Patterns set, the cube design, from white cardstock and cut it in half.  I added a layer of gesso to my base piece and pressed the two halves of my diecut design into the gesso.  I also used the AWWW Star Spray Stencil (discontinued but Suzanne still has some or you could cut your own with the new die) by pressing the stencil into the wet gesso at the top right and bottom left.  It's a subtle look but the extra texture is nice.  Let the gesso dry.  Color was added with paint using water to help it move and blend and wiping it back a bit in some areas.  The blue color you see is also paint applied through the "leaves" part of the ECD Shade Tree Stencil.  The white dots you see in the background are Texture Paste through the Dotty Stencil.


Once Upon A Time is cut from both brown and white cardstock and layered together as shown.  The Idea-ology Paper Dolls are colored with Distress Markers.  Shading is added around the edges and under the girls with Distress Crayons.  The butterflies are some fallout pieces from cutting the new Butterfly Spray for a different project.  Finally I added some Sticky Back Gems.


I hope you like this project!!  It was so fun to go really mixed media with it :-)

Hugs, Wanda


Tuesday, January 15, 2019

A Way With Words - Brand New Release


Happy Tuesday!!!  I hope today finds you well and safe.  Lots of weather been happening.  We got almost 10" of snow at our place this past weekend and finally our road was plowed midday yesterday.  

Besides weather something very exciting happened this past weekend.  The pre-release of the brand new A Way With Words cutting die release.  These are an Elizabeth Craft Designs product by designer, Suzanne Cannon, owner of Quietfire Design.  The official release at ECD is coming on the 21st.  There are 6 skus and you can see them all below.  I am so excited for the butterfly spray to be a die!!!  Suzanne has a post on the Quietfire Creations Blog HERE talking about the new release.  


I'm sharing a card today that uses the new word, Shine, and the Star Spray.  I cut the Star Spray from watercolor paper.  The white star fallout pieces were set aside and then the cut panel was colored with a combination of Distress Inks and Distress Oxide Inks along with water working in layers.  

For the shiny, shine piece I die cut a Stitched Oval from Silver Mirror Card.  The edge was inked with Embossing Ink and embossed with White.  Shine was die cut from white cardstock.  Shine was glued to the oval and then the oval layered onto my background.  I then used some of the white fallout star pieces to add to my background and by the word, Shine.


I also used a Wink of Stella pen to add some shimmer to the inside of the stars and on the word, shine.  This last picture is me trying to hold the card so you can see that shimmer.


See you tomorrow with another sample for the new release :-)

Hugs, Wanda

Thursday, January 10, 2019

The Love We Give Away Mixed Media Card


Hi!!!  Today I'm sharing the how-to's for this mixed media card over on the Quietfire Creations Blog.  I hope you have time to check it out!!!

Hugs, Wanda

Monday, January 7, 2019

Elizabeth Craft Designs January Designer Challenge


Happy Monday!!!  I'm here sharing a post for the Elizabeth Craft Designs January Group Post focusing on planner pages.  I've created a January tab page reminding myself to "be Brave TODAY".  It can be hard to break free from bad habits or things in our lives.  It takes courage and perseverance.  We have to Be Brave.

To see what all the other designers have created head on over to the Elizabeth Craft Designs Blog HERE.

I've used dies from the Planner Essentials 1 set, A Way With Words Be Brave Bold Yourself set (QF / ECD), and a stamp from the A Way With Words Months & Numbers Collection (QF / ECD). 

I die cut the page from Watercolor Paper.  My background is a really easy one.  I used Fresco Finish Chalk Acrylics (PaperArtsy) and a mini brayer.  I put a small dot of the blue color (Beach Hut) on my craft mat, added a little water, mixed it around and lightly brayered it onto the paper.  If you use a light hand then you get splotchy coverage.  I repeated this - minus the water - with a yellow color (Banana).  The stamped blue circle shapes you see are made with the plastic center that is left after using up a roll of double sided tape that goes in my ATG gun and are stamped with Beach Hut paint.  The smaller yellow circles are stamped with the Banana paint.  I created the small stamp by gluing a few of the plastic circles that you remove from A Wink of Stella pens to a foam square.  

For the pink die cut squares and circle reinforcements I colored a piece of glossy cardstock with Alcohol Inks (Ranger Ink) and then die cut the shapes.

I cut a slit in the squares so I could glue them on like a chain gluing them under and over each other to get the right look.  For the last chain I cut out a section with a jagged cut so it would look like it was broke.


"be" was cut from black cardstock.  "Brave" and "Today" were cut from both black cardstock and the pink alcohol ink piece.  The pieces were assembled and attached as shown.  Doodling on the page was done with both a white gel pen and black fine tip pens.  I also glued on the fall out circles from die cut circle reinforcements. 


January was stamped with Archival Ink Jet Black (Ranger Ink) and then highlights added with a white gel pen.


I hope you've enjoyed reading about the page and you are inspired to create something!!!

Hugs, Wanda