Thursday, October 22, 2020

Purple, Orange, and Green


Hello Friends!!!!  I have a beautiful project today as a guest designer post for The Funkie Junkie Boutique Blog.  It's for their current challenge "Purple, Orange, Green! Eek! It's Halloween".  Sara Emily is the host for this challenge and she says, 
"I love Halloween, and I would love to see your vintage or shabby chic Halloween creations, whether it be a card, tag, canvas, or any other make! If Halloween is not your cup of tea, simply use the colors purple, orange and green on your project to play along."

Halloween is not my cup of tea but I did have fun combining all three colors to create this piece.  My base is a Mini Etcetera Tag.  Don't let the word mini fool you.  This tag measures 4 1/2" x 8".

I cut a piece of Mixed Media Heavystock a little bigger then the tag.  Using a large (12" x 12") stamping platform and all the stamps from the Stamper's Anonymous Tim Holtz set, Scrollwork CMS367), I stamped the images with Embossing Ink and embossed them with White Powder.


Using a variety of Distress Spray Stains and Distress Oxide Spray I added color to the paper.  When the paper was fully dry I attached it to the Etcetera tag using Distress Collage Medium Matte putting some weight on top of it while it dried for a good bond.  Once dry the excess was trimmed off and the last bits sanded off for a smooth edge.


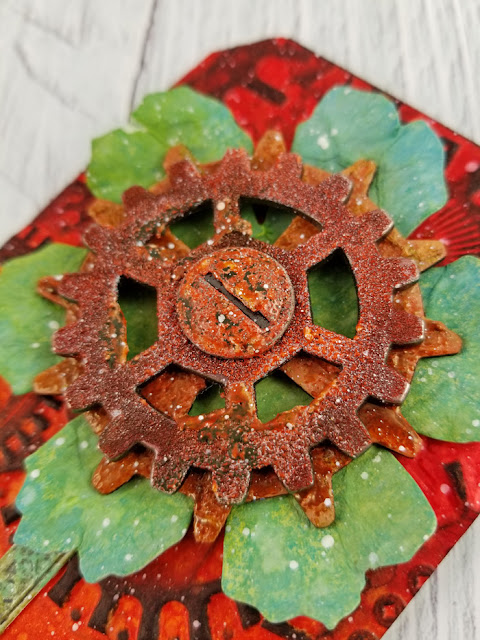
I painted the very edge of the tag and the hole reinforcer with Distress Paint then mixed a bit of paint with Crackle Paste and added it as shown.


Etcetera trim was used to make a shelf, painting the pieces with Distress Paint and attaching them with Collage Medium.


To emphasize the cracks Distress Crayon was scribbled on, and then I used a combination of a water brush and my finger to spread the crayon allowing it to get into the cracks.


Idea-ology Baubles were colored with Alcohol Ink.  The baubles were put into a container, a couple of drops of ink added, the lid put on and the baubles shook around. I wanted a bit more color so added a couple more drops of ink and shook again.  After removing the cover, I left them in the cup to dry.


The girl is an Idea-ology Baseboard Doll.  The baseboard dolls are a thick material that doesn't bend making them the perfect choice when you don't want to attach them close to your surface.  She was colored with Distress Crayons and a damp waterbrush.  A silver gel pen was used for the necklace.


Idea-ology Letterpress Blocks were painted with Distress Paint just on top of the letters and dots added using Media Gloss Spray and a stylus.  I sprayed a little of the media on my Glass Matt, dipped the ball of the stylus in and then on the letters.  I really like the shiny dot against the paint.


I also added dots to the edge of the trim.


Using the Tim Holtz Sizzix set Wildflower Stems #1 I cut flowers and stems from watercolor card.  They were colored using Distress sprays and inks.  I added wire to the back of the flowers so that they would stand eaiser without bending.


Collage Medium Matte was rubbed on the outside of a glass vial to give it a frosted look, the colored baubles put inside and all the stems and flowers put in.  I then added Glossy Accents to the vial.  After several days it still wasn't completely dry and had taken on some color from the beads.  A better choice would have been to put resin in the jar or to add the Glossy Accents just a little at a time.  

All the open area on the trim was bothering me so I stamped on it using an image from the Tim Holtz Stamper's Anonymous set, Ornate Trims CMS326.  I lined up the stamp close to the edge of the acrylic block and held my breath while stamping, LOL. 


Ribbon was colored with Distress Spray Stain, bunched up and allowed to air dry giving a wonderful crinkle.

All the butterflies, mushrooms, ephemera, words, etc are from various Idea-ology packs.  Many of the edges were inked.  The piece of ephemera behind the circle and little butterfly was stamped with the background image from Tapestry CMS414.  The word "precious" is a rub on added to the circle.  The Clippings stickers above the girl have a thin layer of Glossy Accents over them.


Behind the Baseboard Doll I have 2 Idea-ology game pieces (retired item) stacked and glued together (edges painted orange) along with a thin piece of foam tape.  These are glued to the tag and the girl giving her plenty of support.  Landscape mossy stuff looks fabulous glued to the shelf and the top of the Letter Blocks.

The clippings sticker below the shelf was attached to white cardstock, the edges distressed and inked. 


For one of the flowers I cut an extra flower head and attached them together just in the center for a fuller flower.  Flat backed pearls were glued to the center of the flowers. 


I really had fun creating this!!!  The combination of colors is not in my comfort zone but I think it came together well.  I hope you think so too.

Thank you for following along and I hope you are inspired to play along with the challenge even if Halloween isn't your cup of tea.

Hugs, Wanda


Friday, October 9, 2020

When I Count


Hello!!!  The leaves have started to change around here just a little.  We had been feeling the fall weather but then this week has all been above average temps and feeling a bit more like summer although it won't last much longer.

There are two challenges that inspired the direction of this card.  First on The Funkie Junkie Blog the current challenge is Fall Foilage.  Second on the Simon Says Stamp Monday Challenge Blog the challenge is Dry Embossing.  Also this month Simon Says Stamp's IG Challenge is Fall Color so I'll be entering it over there too.


I used Mixed Media Heavystock for my main panel.  Color was added with Distress Spray Stains first spraying it on, drying and then dipping into the left over color, drying and repeating until I was happy.  I embossed this panel with the Leaves Texture Fade using the circle Diffuser plate set.  I placed the rectangle piece with the circle cut out over the texture fade as my second plate.  This embossed the leaves everywhere except where the circle was cut out.  I lightly sponged Distress ink over the embossed panel to bring out the leaves more.  I also set the circle part of the Diffuser set over the circle area that did not emboss and using a Distress Blending Brush added color around the edge of the circle.  Distress Paint Picket Fence was splattered over the panel.


The sentiment is from the Sweet 'n Sassy stamp set, SNS-20-026 Friendship is a Blessing.  Distress Spray Stain was used on a Mixed Media Heavyweight #8 tag using more yellow colors - same process, spray, dry, dip, etc. but I also dipped into a little orange.  The sentiment was stamped with Archival Ink Black Soot, die cut with Sizzix, Tim Holtz, Stitched Circles and Distress Paint Tarnished Brass added around the edge.  

For all the leaves I began by making 3 colored panels using Distress Watercolor Card and Distress Spray Stains (spraying, drying, dipping, etc.) and then die cut all the leaves in the set, some from each color.  I added more detail with Flower shaping tools and Distress Ink Vintage Photo.  


Tuesday, September 15, 2020

Cheerful and Optimistic


Hi There!!!!  Life is always better when we are cheerful and optimistic.  For me, as long as my focus is where it should be - on God - then cheerful and optimistic happens!!


I recently got some Viva Signature Cloth paper towels.  These were mentioned during the Tim Holtz demos this summer whenever he shared a technique that he wanted a smooth paper towel for.  One technique he shared is Eroded Metallics.  This is a technique done with Distress Paints.  I did the technique after the demo but only had regular paper towels and it does pick up the texture of the paper towel.  That wouldn't always be a bad thing but not something I would want all the time.  After the demo I tried to get some of the Cloth paper towels and couldn't find any in stock.  Last week I checked again and was able to order some from Amazon.  Now that I have them I wanted to do the technique again to really see the difference.  

I painted a piece of Distress Mixed Media Heavystock.  I just had to use the newest color, Crackling Campfire, and combined it with Peacock Feathers.


After drying I added stamping with Crackling Campfire using one of the new release Background Images from the set Tapesty (Stamper's Anonymous, Tim Holtz).


That was dried and next comes the metallic.  I used Tarnished Brass, painted it on, splattered on water getting more in some areas and just drops in others, let it sit a few seconds, laid the Paper Towel on letting it sit just a few seconds and took it off.  Worked great.  In the areas where the water was the paper towel picked up the metallic paint without leaving a pattern behind, just an open area.  So Cool!!!


Instead of just putting the paper in a pile I used it right away to make a card for the current challenge on the Funkie Junkie Boutique Blog which is Birds.  

Leaves were stamped along the top and part way down the sides with Archival Ink using an image from the Nature's Wonder set (Stamper's Anonymous Tim Holtz).  The edges were distressed and messy stitching added.


The bird is a die cut from watercolor paper and colored with Distress Oxide Ink.  A fibery ribbon and torn papers were glued across the paper and twine wrapped around it.  The speckles (from the Tiny Toadstools set) were stamped with Oxide Ink.


Sunday, September 13, 2020

Gear Flower Tag


Hello!!!  I hope this post finds you well and safe.  So many things going on here in the US.

I started with a #8 Mixed Media Heavystock tag.  My order of Crackling Campfire had just come in the mail I wanted to make a blend which I did also using Candied Apple and Carved Pumpkin.  Splatters of water added texture.

Then what to do...  I took inspiration from this month's A Vintage Journey Challenge which is Cogs, Gears and Texture.  I misted the back of the tag with water and then embossed it with the Sizzix, Tim Holtz 3D Embossing Folder running it through my Vagabond 3 times (3D - 3 Times as Tim says) to give it a fabulous, dimensional design.

To really bring out the design I added Ground Espresso using a Mini Ink Blending Tool with a light touch going over and over to catch all the texture.  I painted the edge of a #8 Etcetera tag with Black Soot Distress Paint and then glued the tag to it with Distress Collage Medium.

I neglected to take any process pics of the gears or flower.  The top gear is from the Idea-ology Gadget Gears pack.  The bottom gear is chipboard die cut with the Gadget Gears Bigz Die.  The large screw head is from the Idea-ology Machinery Heads pack.  I used a variety of product to give them that old, rusty look - Grit Paste, Distress Paint, Distress Embossing Glaze, Distress Crayon. 

The flower is Mixed Media Heavystock paper die cut with the Tattered Florals Bigz die.  Color was added with Distress sprays and inks and the flower crumpled while still damp.

The gears were layered with foam mounting tape and a bit of Distress Collage Medium to be sure everything stayed stuck.  The screw head was glued on with Collage Medium and the whole stack glued to the tag with Collage Medium.

For the stem I die cut Heavystock with the 3D Lattice Trim die, inked the narrower piece with the Distress Embossing Dabber, sprinkled Distress Embossing Glaze, and melted it.


Hickory Smoke crayon was added moving it around first with a water brush, drying, and then adding more and rubbing it with my finger.


Everything was splattered with Distress Paint Picket Fence.  Small talk stickers were chosen, edged with Crackling Campfire, spritzed with water to mottle the ink, and glued to the tag.  A bit of Distress Paint was added tot he bottom edge of the tag using my finger, dried, and Distress Crayon rubbed on.


This was a fun tag to make!!!  I hope you like it.  My daughter will probably try to steal it :-)

I pray your week goes well.

Hugs, Wanda

Saturday, August 29, 2020

What A Friend


Happy Saturday!!!  I hope you're weekend is going well.  We have a quiet day today and tomorrow we will be watching our granddaughter 💓

This was a fun card to make!!  I love how the background came out!!  I put the inks shown onto the non-stick sheet of my Media Mat, sprayed them with water and dipped in a piece of Mixed Media Heavystock - going back and forth between drying the paper, spraying the paper, and dipping more until I liked it. Before putting the paper into the 3D embossing folder I misted the back of the paper and then put the folder with paper through my Vagabond 3 times for a great emboss.


Using a Mini Ink Blending Tool I inked the embossing using a light touch to keep the ink just on the high spots.  Doesn't it look wonderful!!!


I recently got some stamps from Sweet 'n Sassy stamps and chose this one for the card stamping it with Black Soot Achival Ink using the Stamp Platform.  This is a great hymn!!!  After stamping I die cut it with a Stitched Squares die (Sizzix, Tim Holtz) and inked the edges.


I made another dipped in ink paper using both regular and oxide Speckled Egg and Distress Watercolor Paper.  The flower is from the Wildflowers #2 set of dies.


The Distress Marker was used to add green to the stems.  I inked the pieces using the Distress Embossing Dabber and embossed them with Distress Embossing Glaze Speckled Egg.


I cut a square from the left over speckled egg watercolor paper, distressed the edges and layered it under the word panel.  The edges of the background panel were machine stitched.  The Idea-ology metal bow was painted with Distress Paint Picket Fence rubbing the paint around with my fingers, dried it, then added some Archival Ink using my finger.

I love how the card came out!!  I hope you do to.

I'm entering this into the Simon Says Monday Challenge - Beautiful Botanicals

Hugs, Wanda


Thursday, August 27, 2020

Guest Designer - It's A Wrap - Funkie Junkie Boutique Blog

 Hello and Happy Thursday!!!  I'm so excited to be the guest designer for the current challenge on the Funkie Junkie Boutique Blog, It's A Wrap.  Sara Emily is the hostess for this challenge and she made a gorgeous wrap card.  The other designers also have wonderful projects so be sure to check them all out if you haven't yet!!

I chose to create a complete ensemble to use for wrapping a Christmas gift.  If you remember my winning entry (found Here), it also had poinsettias on it.  Nope, that's not why I have poinsettias here, I just like them :-)

I have packing paper that I've saved over time when receiving orders that include this off-white paper.  The pieces I have are rather large so I tore one in half by creasing the paper very well, getting the crease damp and tearing. I also tore a little bit off the other 3 edges to match.


I began by lightly spraying the paper with Gloss Spray (Olive).  If you press quickly you get a nice mist but if you press slower you get nice splatters so I also did some of that.


Once dry I went to stenciling on the poinsettias using Distress Paint.  I used the Tim Holtz stencil, THS049.  The stencil design includes 3 complete poinsettias and then also partials.  I only wanted to use the whole poinsettias and so to make stenciling easier and quicker I taped off around them.  Using Tim Holtz blending brushes I first added either worn lipstick or victorian velvet or a combination coloring the whole poinsettia. 


Next I used barn door brushing from the point of the leaves toward the center, not coloring the whole flower.  After those 3 flowers were done then I'd move the stencil and do the next 3.  The victorian velvet would eventually take over the first blending brush no longer really showing the worn lipstick.  At that point I'd wipe the brush well on a paper towel and then continue with the worn lipstick.


The paper all stenciled.  Once I was finished with the paper I cleaned the brushes by wiping them on a damp paper towel and then a dry paper towel.  The bristles remain stained but they are clean of paint.


Using a stylus, dots of mustard seed were added to the centers of the flowers.


I also added little spots of tarnished brash to the centers using a little paint brush.  Finally I splattered both tarnished brass and picket fence across the paper using the Tim Holtz splatter brush.


A close-up.  I love how the light catches the metallic spots as the package moves.


Next I created a trio of tags to hang on the package.  The tags look wonderful on the package and I also allowed extra room for putting the name and/or a note to the recipient.


The largest tag is a #8 Distress Heavystock tag.  I sprayed it with the olive Gloss Spray and dried it.


Using the Merry Christmas background image I stamped with Embossing Ink and embossed with Rose Gold powder.  If you place the stamp rubber side up, ink it, and take your tag to the stamp, you can get the words lined up straight across the tag.


Finally I inked over the tag with Distress Ink Evergreen bough to add a bit more color. After inking I wiped the tag with a dry paper towel to remove any excess ink.  Later (not shown in this picture) I sponged pine needles Distress Paint onto the edges of the tag. 


The middle tag is a #5 size.  I didn't have one so I used the Sizzix Stacked Tag die set to cut one from Mixed Media Heavystock.


I turned the plaid background stamp face up, used a sponge to "ink" the stamp with Distress Paint mustard seed, laid the tag onto the stamp (this allowed me to line up the image with the tag for straight lines), covered the tag with a scrap piece of paper, pressed well and carefully removed the paper and the tag. I then stenciled 3 poinsettias onto the tag in the same way I did the wrapping paper, added gold paint dots to the centers of the poinsettias and sponged the edge of the tag with gold. 


For the smallest tag I used a mini brayer to add worn lipstick paint to the tag, splattered with Gloss Spray olive, inked the edges with crushed olive Distress Ink, and sponged the very edge with pine needles paint.  


A Christmas clippings sticker was added to the smallest tag.  All 3 tags were splattered with Picket Fence Distress Paint and then tied together with jute.


I used the new Sizzix Tim Holtz Bigz die, Festivities, to die cut the pieces for the embellishment on the package.  I cut the die twice from Mixed Media Heavystock paper.  One flower was painted with worn lipstick and the other with victorian velvet.  Barn door was added to the centers of the petals using a sponge.  Details (vein lines) were added using flower tools and mats.  A stylus and piece of chipboard would also work.  The greens were sprayed with Distress Spray Stain mowed lawn and Gloss Spray olive and allowed to air dry.  Both the flowers and the greens were splattered with Picket Fence.


The center pieces were painted with mustard seed and once dry the edges inked with evergreen bough.


After attaching all the pieces together they were sprayed with Distress Resist Spray and dusted with Rock Candy Dry Glitter using the Glitter Duster.


I dyed some vintage ribbon with a combination of Distress Spray Stain and Gloss Spray.  I put the ribbon in a plastic bag, sprayed in the colors along with just a little water, and worked it around.


Once colored I put the ribbon on a paper towel, squeezed it just a bit and then left it to dry.


I wrapped both jute and the ribbon around the gift, added the tags and the embellishment.  A beautifully wrapped gift for someone special in your life.

Just in case you're wondering, no, I don't actually have a Christmas gift ready and wrapped.  I used removable tape for this project so I can take it all apart and really use it once I'm ready for that.

I do hope you like this project and that you picked up some ideas even if you don't want to create a whole ensemble.  If you have time, I'd love to hear what you think in a comment.

Many thanks to Linda and the team for allowing me to be your guest designer!!!

Hugs,  Wanda