Sunday, October 27, 2019

Hello Beautiful


Hello Friends!!! I know, it's been awhile since I posted.  Life is good but busy.  The grandbabies are growing so fast!!!!  I'll have to post a picture of them soon for any of you that don't follow me on social media.  I have done some creating but it's usually because I need a birthday card or sympathy card.  I need to be working at taking the time to get those cards blogged.

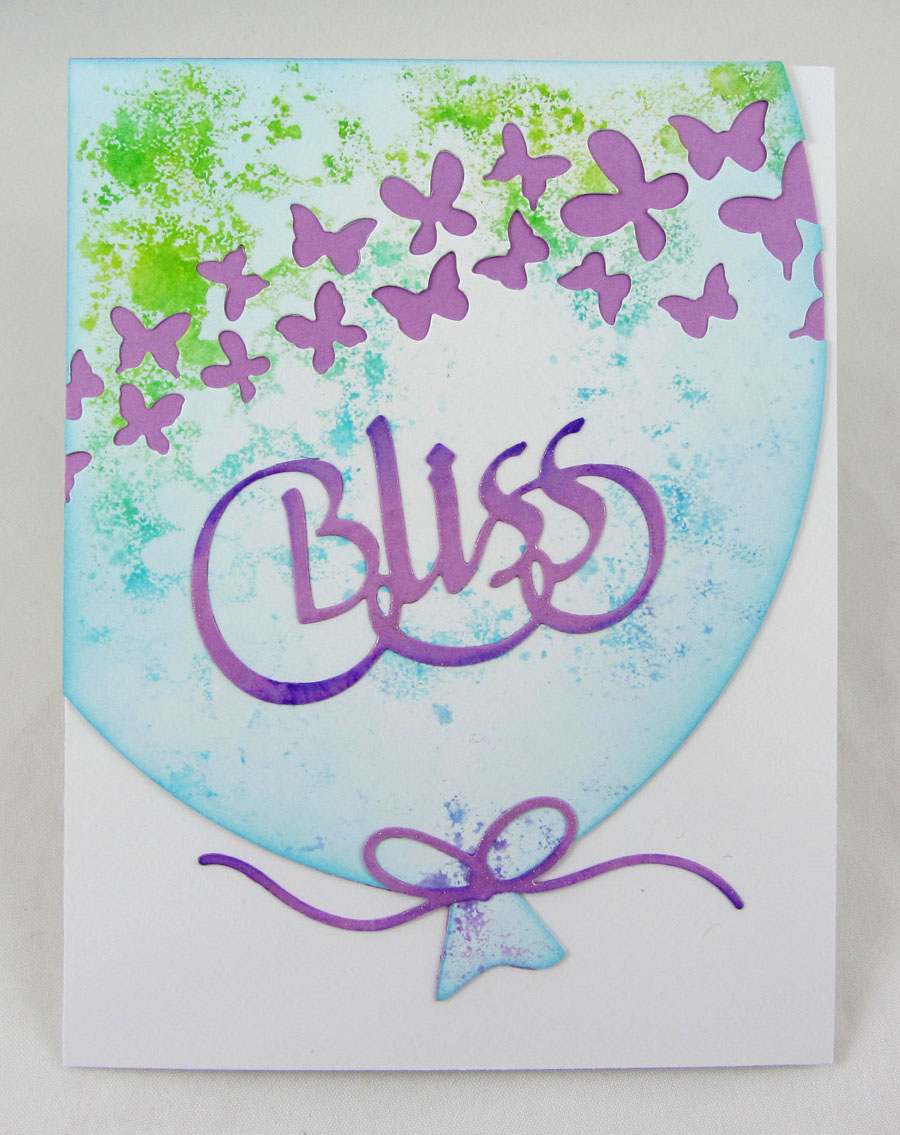
But onto today's card.  I recently won a give away on Instagram by Graciellie Design and got to do some shopping.  She has beautiful digital designs.  This card uses a butterfly from the Beautiful Birthday Wishes Stamp Set and a sentiment from the Hey Lovely Stamp Set.

I printed out the butterfly with our laser printer and then foiled it using Deco Foil Amethyst Watercolor Foil and a hot laminator.  I cut out the butterfly leaving a small border.  The yellow was added with a gel pen and then I sprayed the butterfly with Pearl Mica Spray wiping the mica off the foiled areas.  This gave a great shimmer as the image moves.

Scroll down for background info.


My background began with a paper in my stash from a gel printing session.


After cutting out the area I wanted to use, I stamped a Wendy Vecchi leafy branch image across the top and bottom edges with Archival Ink Fern Green.


I added a bit of ink all around the edges and then attached the background to a folded white card.  The butterfly was attached leaving the outer areas of the wings unattached to lift up.  The sentiment was distressed around the edges, inked, and attached with foam mounting tape.

I hope you like card.  I think it's beautiful.  Many, many thanks Graciellie!!!!

Hugs Friends, Wanda


Monday, July 22, 2019

Gel Print Birthday Card


Hello Friends!!!!  I hope you are having a good July!!!  Last week was so hot in Iowa but it has cooled down to something a bit more comfortable for this week.  Still plenty warm but so much better.

This card was made for a young man's birthday.  You can maybe tell that he turned 19 :-)  The background is part of a Gel Press Plate print and I added embossing powder around the edges.  Then there is some blue washi tape and the black and white strips with words or numbers are from a Tim Holtz Idea-ology set of tapes.  The ring around the 19 is a black plastic ring from something and I used embossing powder on it.  


Monday, July 8, 2019

A Month of ATCs (that's 30)

Hello Friends!!!!!!!!  Long time no blog!!  Over two months since my last post.  It's been busy.  Lots of time working in the shop and lots of time with the grandbabies.  This picture of Lola and Daniel was taken about a month ago when everyone was here at the same time (so they were both about 4 months).  They are growing so fast!!!  We usually get to see them each at least once a week, sometimes more.  


Here they are towards the end of February, so just a few weeks old. 


I do get in some creative time and post quite a bit on Instagram (and FB).  It just seems harder to make time to write a blog post.  I'll try to do better.

There was a challenge for the month of June, #atcad2019, that my daughter was interested in and wanted me to play along also.  We were to make an ATC (artist trading card) every day for the month of June.  I got behind at times but always managed to catch up and actually did 30 ATCs.  (for anyone that doesn't know, and atc is the size of a sports card, 2 1/2" x 3 1/2")  These are all posted on my Instagram account, many with additional process/supply pictures.  Here I'll just share the finished atc with no additional details but I'm totally happy to answer any question you might have.  I gave myself an additional challenge when I started.  That was to start every atc with an already made (or started) background.  I have piles and files and boxes of background play that need to get used.  It also would save a bit of time.  I must say though, it was hard at times.  I love making backgrounds and sometimes I'd think, "oh, I should try this; or play with that" but I'd rein myself in an choose something already done.  Many times I did build upon the started background though, adding more layers... fun stuff!!!  And I truly did have fun doing the challenge!!!

Here they all are in chronological order, Days 1 thru 30.


(not seen in the pic - the white die cut flower is covered in Distress Rock Candy Dry Glitter)


Sunday, April 28, 2019

With Sympathy


I needed a sympathy card awhile back.  It seems these things happen when there is not a lot of time for cardmaking.  Simple can be beautiful though.

A Tim Holtz (Stampers's Anonymous) stencil and Distress Ink for the blue in the background.  A Tim Holtz (Sizzix) die cut flower watercolored with Distress Inks and some splatters in the background with the same ink.  The sentiment is a Quietfire Design stamp.  White on white matting.


Monday, April 22, 2019

Three Projects


Hello!!!  Long time no posts.  Yes, I'm still around.  It's just been really busy.  I recently went through my pictures from the last few months to find projects that hadn't made it to my blog yet.  These 3 projects use mostly A Way With Words cutting dies, designed by Suzanne Cannon for Elizabeth Craft Designs.  Some of the dies are from the newest release and others are older.  I've also used some dies from the Elizabeth Craft Design Planner Collection and some circle Frame-It dies.


The balloon on this card is die cut from a piece of cardstock that blotted up excess ink from another background.  After cutting the balloon, the butterfly spray was cut across it and then the edges of the balloon inked.  Bliss was cut from the same color added behind the balloon to show through the butterflies and then ink was added here and there.  The balloon tie was done the same way as Bliss.


The background for this card was created with Distress Oxide Inks.  First I put ink on my craft sheet, added a bit of water and pressed the paper into the ink.  After that I added more ink with an ink blending tool.


The word Welcome was die cut from white and embossed with clear embossing powder.


This project is a planner page.  For the background I used spray inks and paint laying down die cut "masks" before spraying and inking to create a layered background.  The dies (Planner Patterns) used to create the "masks" are from the Elizabeth Craft Designs Planner Collection.  The Butterflies are the fall out pieces from the Balloon card.  The circle under the word Notes is the fall out circle from the Baby card.  


The grey lines on the page were created using paint and a junk plastic card.