
Hello!!! I received my order of the new Seth Apter Baked Texture Embossing Powders made by Emerald Creek this week and played just a bit. These are some way cool embossing powders!!!!!!!!!!
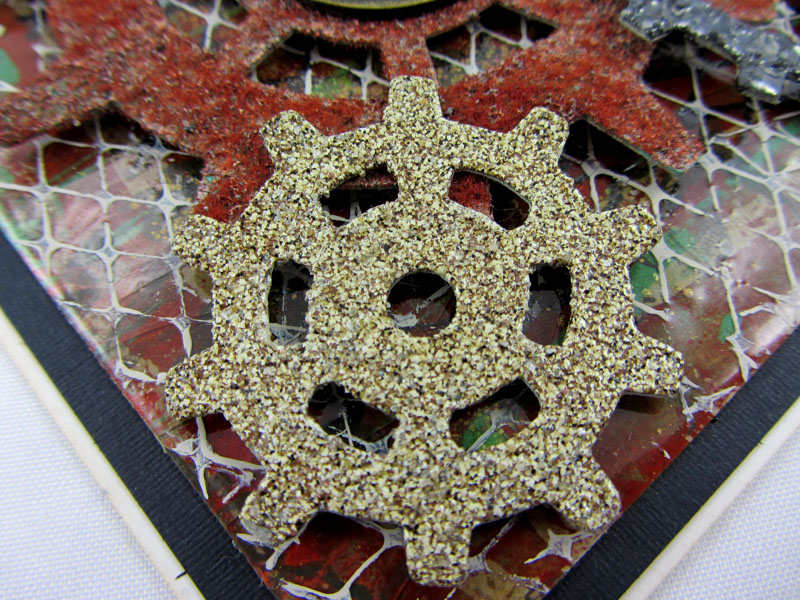
I die cut the Sizzix Gadget Gears 1 and 2 from Grungepaper and then tried some of the embossing powders. The largest gear was embossed with Chunky Rust and I did 2 layers. Looking at the card, both the top gear and the small one farthest to the right were embossed with Patina Oxide. The small gear has one layer and the larger gear has two layers. The other medium sized gear, black in color, was embossed with Rocky Road, just one layer. The other small gear was embossed with Dirty Sand, just one layer. Way Cool!!!!
For my background I started with a piece of Distress Mixed Media Heavystock paper cut 5 1/2" square. I added a few colors of PaperArtsy Fresco Finish paint first applying the paint using a junk mail plastic card and then "stamping" on it using corrugated cardboard. I put the paint on my craft sheet, spread it with my finger, pressed the corrugate in the paint and then onto my paper. Next I embossed my piece with Vintage Beeswax and I put 3 layers on. When I was doing the third layer I thought it might be cool to stamp into it and I chose a large background image (Wendy Vecchi, Vintage Mesh). I inked the stamp with clear ink and then worked at heating the embossing powder but it was too hard to keep an area that large all hot. (I should have known that, duh). Anyway I stamped the background but didn't get much of an impression but I did have the ink there and decided to add some powder. I chose Rocky Road. It worked really well. I thought it might spread too much when I heated it but kept moving as it melted and it was very cool. I also sprinkled on some Ancient Amber giving some nice metallic highlights. Next I was laying on the gears and thinking about putting some words. I thought I needed to lighten the background in the area I was putting the gears so stamped on top of the embossing using Fresco Finish Paint, again using the Vintage Mesh image.

Now for the words. I was trying to decide if I should layer them on or try to stamp them directly on or just what to do. I chose a stamp from the Tim Holtz set, Life Quotes CMS227. I wondered if I stamped it onto tissue paper if I could just melt the embossing powder and add the paper. I stamped onto the new Tim Holtz Collage Paper Plain embossing the words with a detail White Powder and tore the paper around the words. Then I thought it would probably be difficult to melt the powder and get the paper placed before the powder cooled so I thought I'd just glue it on. I did this with Distress Collage Medium Matte. I put the medium on the back of the paper, put it on my background and then put some on top of the paper at which point I thought, "oh, I could add embossing powder to the wet glue", so put on the Vintage Beeswax. And then began melting it. This was another Duh! moment. The medium is acrylic and therefore will bubble if you heat it when it's not dry. It did a bit but I was able to kind of press it back down as the powder cooled. I did ink it and do another layer of the Vintage Beeswax. The detail white embossing stayed very well, I'm sure because of the matte medium. Over all I think it came out looking really cool. The only thing that drives me crazy with it, is the words went a bit crooked. Otherwise, I love it!!! I attached all the gears with foam tape and then added an Idea-ology gear with a brad over the largest gear.

I've added some close-up pics below. If you have any questions, please don't hesitate to ask. Enjoy your day!!!
Hugs, Wanda


1 comment:
I am just about ready to order some of these marvelous embossimg powders, and I can hardly wait to play with them. The card is great inspiration for what I will do. Thanks so much.
Post a Comment