Friday, August 31, 2018

Autumn is the Hush before Winter


Hello!!!  I'm here with an Autumn card using brand new Quietfire Design stamps.  I've used 2 stamps from the Autumn Collection and the new Grid Background stamp.  


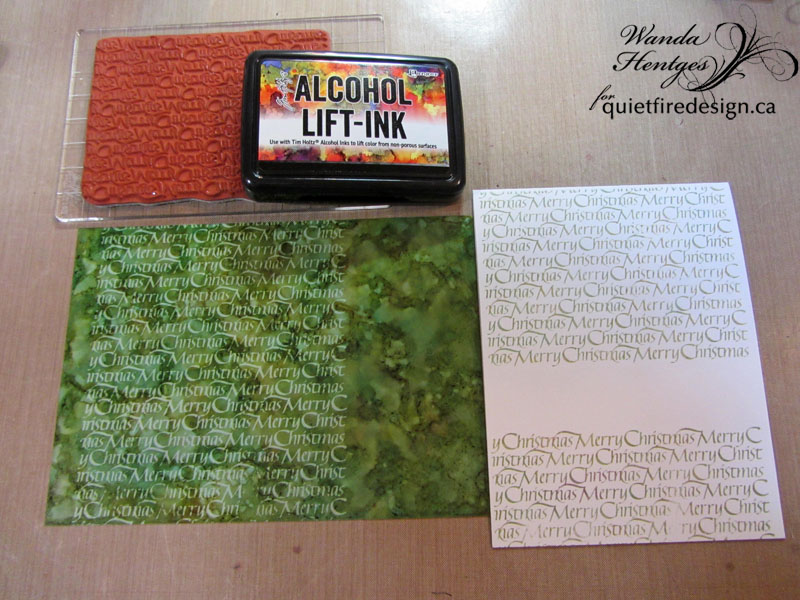
I started with Ranger's Mixed Media Cardstock, Distress Ink (Mustard Seed, Carved Pumpkin), and Distress Oxide Ink (Twisted Citron).  Put the inks on my craft sheet, added water, dipped, dried, dipped again, etc. 


I stamped the Grid Background with Barn Door Distress Oxide Ink and dried it.  I used the Stamp Platform for the quote.  I got it lined up, stamped the quote, added paint (Distress Picket Fence and Squeezed Lemonade), to mute the background so the quote would pop more, dried it, and stamped the quote with Archival Ink Jet Black restamping until it was nice and dark.  

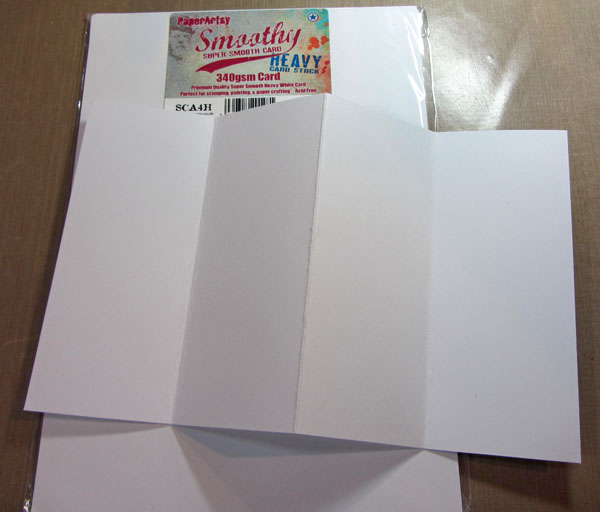
I stamped the Wheat image across the bottom using Embossing Ink and added Emerald Creek, Seth Apter Dirty Sand Baked Texture.  I thought all my ink was dry but I did get powder sticking other places.  I used a very small paintbrush to get off the powder from where I didn't want it and then heated the powder.  I liked it but it wasn't quite what I wanted.  I used an anti static bag over that area of the card, reheated the powder and quickly added Ranger Buttercup embossing powder over the warm powder.  It worked well with Buttercup sticking over most of it but there were a few places it didn't which is just what I wanted.  I then heated to melt that powder.  I repeated those steps but this time added Emerald Creek, Seth Apter Ancient Amber powder.  It looks fabulous!!!  Next I wanted more wheat in the background but lightly so stamped those with Distress Ink Scattered Straw.  The edges of the panel are inked with Distress Ink Vintage Photo.  I attached it to a black panel and then a folded white card.  


Finally I thought some Mica would be nice and sprayed it lightly (2 sprays from a distance) with Mica Spray Buttercup.  


Monday, August 27, 2018

Autumn Harvest


Happy Monday to You!!!  I'm sharing a card over on the Quietfire Creations Blog today.  I hope you have time to pop on over there!!!!

Saturday, August 25, 2018

Autumn Day


Happy Saturday!!!  What a busy month August has been!!!  Today, however, is a quiet one at home with time for stamping.  There is a challenge on Facebook started by Lori to encourage people to use their stuff.  She is calling it the #UseYourS**tChallenge .  The first challenge is to make a Halloween (or Autumn if you don't do Halloween) card using the Alcohol Lift Ink Technique.  

For my background I started with White Yupo paper and worked up an alcohol ink background.  Next I stamped the screen (Stamper's Anonymous - Wendy Vecchi image, Set #002) using AI Lift Ink and then stamped it onto regular white cardstock.  Blotted the wet ink off the Yupo and then buffed it lightly.  After that, I did the technique again using a leaf image (Stamper's Anonymous - Tim Holtz, Set #273). 


I die cut the Layered Leaf (Sizzix - Tim Holtz), embossed it with the matching folder, and inked it with Distress Inks.


The sentiment on my card is from an Elizabeth Craft Design's set designed by calligrapher, Suzanne Cannon (Set #CS072 - HappyBirthday Collection)


After attaching the background to black cardstock I thought a little bling would be nice and spritzed it with Bronze Mica Spray (Ranger - Tim Holtz), squeezing slowly and from a distrance so I also got some drops.  The leaf is then attached with thick foam tape.  


Wednesday, August 22, 2018

Baked Texture Board


Hello!!!  I hope you've had a good summer!!!  It's been really busy here, but hopefully, soon, it will slow down a bit.  I'm here today to let you know that I have a post over on the PaperArtsy Blog for the current topic, Baked Texture, and how I do love the Baked Texture line of embossing powders designed by Seth Apter and made by Emerald Creek.  I hope you have time to go check out my project and all the other projects in this topic.  They are fabulous!!!


Thursday, August 9, 2018

It's A Party


Hi There!!!  I'm sharing the details of this card over on the Quietfire Blog.  You can find it HERE.

Friday, July 27, 2018

Christmas in July at Quietfire


Happy Friday!!!!!!!!!!  I hope you've had a good week.  It's Christmas in July over at Quietfire Design and on the Quietfire Creations Blog.  Today I'm over there sharing these 3 cards all made with the same stamps and die but 3 completely different looks.  I hope you have time to go check it out.  You can find the post HERE.   There is a prize to be won over on the Quietfire Creations Blog and all Christmas stamps are on sale, 40% off, at Quietfire Design.


Tuesday, July 24, 2018

Joyeux Noel


This week is Christmas In July at Quietfire Design.  All week long (starting yesterday) on the Quietfire Creations Blog you will see Christmas projects.  There is a give away - you can find the details on the Quietfire Creations Blog.  Also all Quietfire Christmas stamps are 40% off.  A wonderful sale!!!

My day on the Quietfire Blog is Friday but I'm sharing this card here today.


Last week I was able to pick up the Alcohol Lift-Ink!!  This ink is fabulous!!!  I was hooked with my first play (see my previous post).  This is from my second play.  I worked up the alcohol inks on Yupo paper, stamped the Merry Christmas background with Alcohol Lift-Ink, and transferred the pulled ink onto my card.  I had to stamp twice to get all the way down the Yupo paper and when I stamped onto the card I left a space.  The Yupo piece is used in a card that I'll be sharing Friday. 


The Flourished Christmas Tree is stamped with Archival Ink Emerald Green.  Color was added to the ornaments and star with Stickles.  The edges were inked with Distress Ink and then embossed with Queen's Gold embossing powder (Ranger Ink).  The red printed paper is from the Tim Holtz Christmas Paper Stash.  Joyeux Noel is stamped with Emerald Green.  The gold scalloped strip is Gold Metallic Kraft Stock (Tim Holtz) cut and embossed with one of the new Tim Holtz - Sizzix 3D Impresslits, Mini Scallop.  


Monday, July 23, 2018

Accordion Book for PaperArtsy


Hello and Happy Monday!!!!  This book is made for the current topic on the PaperArtsy Blog - Mint, Sage, Claret, and Gold and is on the PaperArtsy Blog today along with my thoughts about creating the book.


On my blog I have step-out pictures of the creating process.  Many of the pictures speak for themselves so I will just add info that might not show or that needs clarification.

I am also entering my book into the July Mini Album Makers Challenge.


My paper is 7" x 11 5/8".  It was folded in half and then each half folded in half to create 4 panels.


I think the best way to stamp with paint is to put some on the craft sheet, spread it with my finger for an even thin area, place the stamp in the paint, and then stamp onto the project.


I forgot to include the bottle of paint - Hint of Mint.


Tone on tone stenciling is very effective!!


The crackle glaze was spread with a plastic card and then I used my finger to make it even thinner where the pages fold. 


Hint of Mint and Claret were mixed to get the pink color added over the grunge paste. 


I stamped the quote a few times to get it nice and dark over the painted background.


After the stenciled flower was dry, I cut it out, poked holes in the center and added shaping to the petals with Susan's Garden Flower Tools and Foam.


Cheese cloth colored with watered down Claret...


... and some done with Gold.


The colored cheesecloth gave the flower something to sit on and added extra texture. 


I painted a scrap of card with Hint of Mint and added a circle of Claret with a large dauber.


Stamped and embossed the flower image.  I didn't really like the circle of Claret and wished I had just added it after with a brush.  I almost started over but decided to still try adding Claret with a brush which I did.  I also used lots of water so it was more like water coloring with the Claret.  I also painted in some Gold.


The Stamp Platform worked great to line up the two stamps and stamp them both at once, multiple times.


To "ground" the flower I added Claret lines using a plastic card and took them into the panels on either side.  It seemed a bit empty under the words of the last panel so I added more branch stamping with Hint of Mint.


The edges were dabbed with Gold paint, Queen's Gold Embossing Powder (Ranger) added onto the wet paint, and heated/melted with a heat tool. 


For the cover I cut Grey Board to size.  Tissue paper was cut so it could be wrapped around the grey board.  I painted the tissue with watery Claret and dried it.


I wrinkled the tissue very, very well and then glued it to the grey board.  Trimmed the corners and glued it around to the back.


Lightly brayered Hint of Mint so the it just caught the wrinkles and also did around the edges.


Mixed Claret with Grunge Paste and put it through the stencil.  Moved my palette knife wrong and pushed some paste under the stencil.  Once I took the stencil off I cleaned what I could off of where it wasn't supposed to be and let it dry.  Put the stencil back on and painted with Gold. 


Added doodling with Pens and glued on gems.  You can still see the pink some but I'm ok with it. 


Stamped the quote onto a scrap painted with Hint of Mint, cut out what I wanted for the front and back covers.  For the piece on the front cover I dabbed on Gold paint with my finger and then heated it to dry allowing it to bubble and then pressing those areas flat.


Attached ribbon, using strong double sided tape, to the back of just the first panel.


Glued on the covers.  The ribbon wraps around the back and can be tied on the side. 


I hope you've enjoyed seeing the process!!!

Thanks for following along!!

Hugs, Wanda