Monday, July 23, 2018

Accordion Book for PaperArtsy


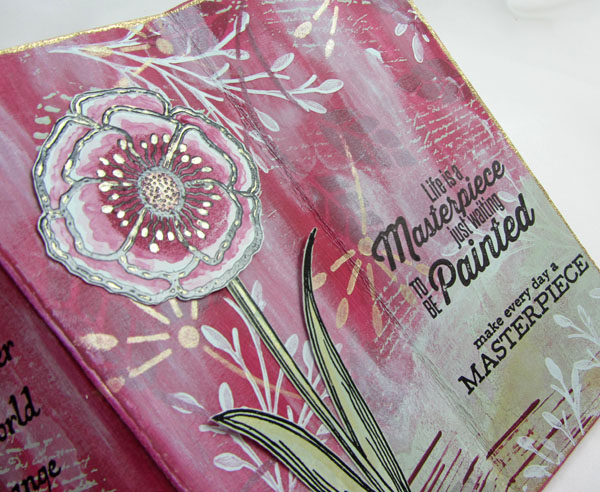
Hello and Happy Monday!!!!  This book is made for the current topic on the PaperArtsy Blog - Mint, Sage, Claret, and Gold and is on the PaperArtsy Blog today along with my thoughts about creating the book.


On my blog I have step-out pictures of the creating process.  Many of the pictures speak for themselves so I will just add info that might not show or that needs clarification.

I am also entering my book into the July Mini Album Makers Challenge.


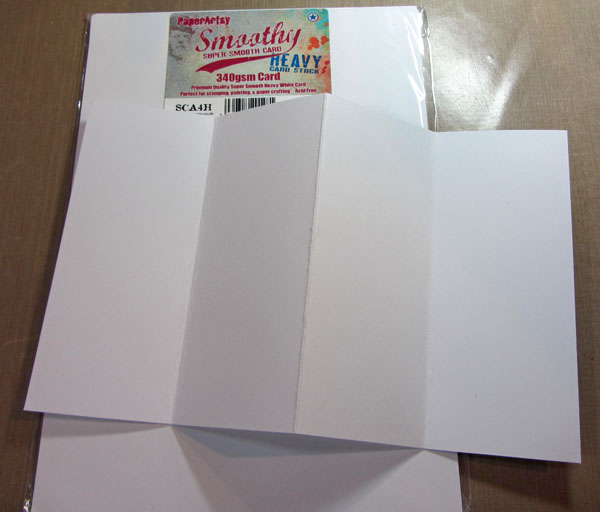
My paper is 7" x 11 5/8".  It was folded in half and then each half folded in half to create 4 panels.


I think the best way to stamp with paint is to put some on the craft sheet, spread it with my finger for an even thin area, place the stamp in the paint, and then stamp onto the project.


I forgot to include the bottle of paint - Hint of Mint.


Tone on tone stenciling is very effective!!


The crackle glaze was spread with a plastic card and then I used my finger to make it even thinner where the pages fold. 


Hint of Mint and Claret were mixed to get the pink color added over the grunge paste. 


I stamped the quote a few times to get it nice and dark over the painted background.


After the stenciled flower was dry, I cut it out, poked holes in the center and added shaping to the petals with Susan's Garden Flower Tools and Foam.


Cheese cloth colored with watered down Claret...


... and some done with Gold.


The colored cheesecloth gave the flower something to sit on and added extra texture. 


I painted a scrap of card with Hint of Mint and added a circle of Claret with a large dauber.


Stamped and embossed the flower image.  I didn't really like the circle of Claret and wished I had just added it after with a brush.  I almost started over but decided to still try adding Claret with a brush which I did.  I also used lots of water so it was more like water coloring with the Claret.  I also painted in some Gold.


The Stamp Platform worked great to line up the two stamps and stamp them both at once, multiple times.


To "ground" the flower I added Claret lines using a plastic card and took them into the panels on either side.  It seemed a bit empty under the words of the last panel so I added more branch stamping with Hint of Mint.


The edges were dabbed with Gold paint, Queen's Gold Embossing Powder (Ranger) added onto the wet paint, and heated/melted with a heat tool. 


For the cover I cut Grey Board to size.  Tissue paper was cut so it could be wrapped around the grey board.  I painted the tissue with watery Claret and dried it.


I wrinkled the tissue very, very well and then glued it to the grey board.  Trimmed the corners and glued it around to the back.


Lightly brayered Hint of Mint so the it just caught the wrinkles and also did around the edges.


Mixed Claret with Grunge Paste and put it through the stencil.  Moved my palette knife wrong and pushed some paste under the stencil.  Once I took the stencil off I cleaned what I could off of where it wasn't supposed to be and let it dry.  Put the stencil back on and painted with Gold. 


Added doodling with Pens and glued on gems.  You can still see the pink some but I'm ok with it. 


Stamped the quote onto a scrap painted with Hint of Mint, cut out what I wanted for the front and back covers.  For the piece on the front cover I dabbed on Gold paint with my finger and then heated it to dry allowing it to bubble and then pressing those areas flat.


Attached ribbon, using strong double sided tape, to the back of just the first panel.


Glued on the covers.  The ribbon wraps around the back and can be tied on the side. 


I hope you've enjoyed seeing the process!!!

Thanks for following along!!

Hugs, Wanda


Sunday, July 22, 2018

Sweet Baby


I made this card for a baby shower a couple of weeks ago.  Teal and Coral are the spark colors in the nursery so I went with that for the card.  I used the Sizzix/Tim Holtz Botanical 3D embossing folder for the background and added color with Nuvo Mousse so it has a nice pearly look.  The baby feet and word Sweet are both Elizabeth Craft Designs dies designed by Suzanne Cannon.  The Circle is a Sizzix/Tim Holtz Stitched Circle Die.  


Saturday, July 21, 2018

Lift-Off Ink First Play


Hi There!!!  We made a trip to Ankeny (Iowa) yesterday and stopped at Memory Bound Scrapbook Store.  I'd pre-ordered the new Oxides and they were in.  I also picked up the Alcohol Lift-Ink and all the new Sizzix/Tim Holtz Impresslits.  

This was my first play with the Alcohol Lift-Ink.  I am in Love... really!!!!  Not only does it lift the alcohol ink wonderfully but the stamped image you can get from your lift... LOVE!!!  Look at that stamped color!!!  It is so pretty!!!!!

I used Alcohol Inks - Raspberry, Pool, and Sunshine Yello - onto Yupo White, blending and layering the colors.  I stamped the Alcohol Lift-Ink with a Stamper's Anonymous/Tim Holtz background image (Botanical, #CMS327).  I will use the Yupo piece another day.  Today's card uses the stamped piece.  I did cut an oval from left side of the paper - Sizzix/Tim Holtz Stitched Ovals.


Using the Stamp Platform I added the quote, Stamper's Anonymous/Tim Holtz Stuff To Say Set, #CMS110. 


I cut the larger scallop impresslit from Gold Metallic Kraft Paper and inked the gold side with Alcohol Ink, Raspberry.


I then trimmed the piece into two sections of 3.


Behind the stamped layer of the card I have a piece of Gold Metallic Kraft that is embossed in the Sizzix/Tim Holtz Botanical 3D Embossing Folder.  


The butterfly is from the Idea-ology Botanical Layers.  The butterflies come with extra space around the antennas, which I totally understand, but...


I like to trim out some of the excess.


After attaching the stamped panel to the gold panel, I added stitching along the top and bottom.  The girl is from the Idea-ology Paper Dolls Pack.  


I had lots of fun creating this card.  I hope you like it!!!!

Hugs, Wanda


Monday, July 16, 2018

Nothing Else But Miracles


Hi There!!!!  This is a quick 4" x 6" page/panel/card - whatever you want to call it - using a few of the new release Fresco Finish Chalk Acrylic colors from PaperArtsy.  You can see all 12 new colors in a post of the PaperArtsy blog HERE. I have just a few of the new colors and used 3 of them here - Peach Nectar, Blah Mange, and Vintage Lace.  I brayered those 3 colors, in that order, onto a piece of Heavy Smoothy Card, with more color around the edges than in the middle.  The leaves and bird and random dots/splatter (not sure what you'd call it) are all from the Sara Naumann stencil PS091.  The leaves were stenciled with Peach Nectar, two layers; the bird with Little Black Dress, and the splatter with both Blah Mange and Vintage Lace.  The quote is from the Sara Naumann stamp set ESN24.  It is stamped with Archival Ink Jet Black using the Tim Holtz Stamp Platform so I could stamp it a few times.  I brushed a bit more Peach Nectar on the edges, added stitching, and then splattered some Little Black Dress thinned with water.  I really like these new colors and will be getting the rest soon.  


Saturday, July 14, 2018

Mixed Media Congrats


A congrats card for a special young woman who graduated college.  "Congrats" is an Elizabeth Craft Designs die by designer, Suzanne Cannon.  The background is PaperArtsy Infusions on watercolor paper and then embossing paste through a TCW stencil.  Gold paint around the edges and attached to a folded black card.  Flowers with a brad to finish it off. 


Monday, July 9, 2018

Beach & Seashells


Hello!!!  This art journal page is created in the Dylusions large journal and is for the More Than Words July Challenge which is Beach & Seashells.  Beach is the word inspiration which means you have to say how the word inspired you and/or use the actual word on your project.  Seashells is the creative challenge which means you have to use seashells in some form on your project.  I chose to use actual shells and also used a stencil of a nautilus.  While Krista was here on vacation we spent time working on this challenge.  My page was almost finished when she left.  I just had to glue all the pieces on.  


All the paint I used on my page is PaperArtsy Fresco Finish paints.  The "sand" is Emerald Creek/Seth Apter Baked Texture Embossing Powder (Dirty Sand).  The nautilus stencil is DecoArt/Andy Skinner (Fossil).  The water splash and dots stencils used in the background are Stampers Anonymous/Tim Holtz.  I stenciled the nautilus using Embossing Paste (Wendy Vecchi) mixed with a little pink paint for a very light pink color.  After the paste was dry, I put the stencil back on and added the light brownish color with Distress Ink, dried it, put the stencil back on and sprayed it with Mica Spray, Pearl (Ranger).  The "footprints" are an old stamp.  I stamped them on Plain Tim Holtz Collage Paper using Archival Ink.  After gluing the footprints to the "beach", I added another layer of the Dirty Sand Baked Texture covering the edges of the paper and getting somewhat close to the footprints.  Love it!!!  After gluing on the shells and charms I also added some Beadazzles (tiny holeless beads and sequins).  


Saturday, July 7, 2018

Always Believe


Hello!!!  I hope this post finds you well!!  It was a very busy but wonderful couple of weeks here.  My husband's brother and his wife were here for a long weekend and then the day they left out daughter and her partner arrived to take their vacation at our place.  They were here for 1 1/2 weeks.  Krista, our daughter, and I spent a good amount of time arting together.  We did do some stamping but we also did lots of acrylic paint pouring.  It's something we were both interested in exploring so I gathered supplies before she got here and we played lots.  I'll have to share a post just about that soon.

Today I have a card to share.  The quote stamp is from Quietfire Design.  Don't you just love Suzanne's wonderful calligraphy turned into stamps for our use.  The little butterfly is a cutting die designed by Suzanne for Elizabeth Craft Designs.  The background is done with the Sizzix/Tim Holtz 3D embossing folder.  It was embossed into black cardstock, inked over with Oxide ink and then metallic added with Nuvo and Treasure Gold.  The die cut flowers are Sizzix/Tim Holtz.  Around the edges of the torn quote panel and along the bottom of the background is Emerald Creek/Seth Apter Baked Texture powder, Chunky Rust and then around all the edges of the background is Baked Texture Rocky Road. 


Monday, July 2, 2018

Artist Trading Coins


Hello!!!  I have a post over on the Quietfire Creations Blog Today.  I'm sharing 4 different Artist Trading Coins.  These are just 2 of them.  I hope you have a moment to check it out.

Hugs, Wanda