Friday, May 31, 2013

Mixed Media Journal Spread


This was fun!!!!!!!!!  I've seen in several places on the web lately a technique where you glue things down, gesso over all of it and then add color giving lots of texture to whatever you are doing.  I love texture and just had to give it a try.  I hadn't done any pages in my scripture journal lately and thought I needed to do something.  I began by gluing mostly scraps from my work area onto the pages, although I did pull a bit of lace out of a drawer.  Let it all dry and gessoed over everything.  Some of the ribbon scraps and one of the burlap scraps had been colored with Distress and therefore the color bled through the gesso but that was fine.  I let the gesso dry, sprayed on various colors of Dylusions sprays, and let it dry.  Then, because Dylusions easily rubs off of gesso, I added Golden fluid matte medium over all of it.  I dabbed it on with a paintbrush or used small brush strokes so the colors wouldn't just all mix together.  It really deepened all the colors and looks awesome!!!  Next I rubbed old gold Inka gold around the edges heavily and over some of the other texture lightly giving great highlights.  The butterflies (a Quietfire Design stamp) were left from previous projects.  The flowers were scraps - I added the color, doodling and stamping.  I cut the stems and leaves from green corrugated lightly adding Distress paint mowed lawn so it just painted the top of the ridges and then adding further highlights with Inka Gold platinum and a white gel pen.  
"Every saint has a past and every sinner has a future" was the main point in a sermon Pastor Chuck gave about a month ago and the scripture was also part of that sermon.  
I had a couple of  turquoise dried paint drops laying on my craft sheet and glued those on and also add a few more drops.  Finished up by adding some white paint doodles and dots. 


Sunday, May 26, 2013

O my soul


A Ranger #10 manila tag.  Glued a piece of Tim's music tissue wrap on the front. Put Distress Paint on a craft sheet and swirled the tag through it.  Added Viva Ferro in old gold through A Crafter's Workshop stencil mini rustic paint.  Stamped leaves (Dylusions) across top with Archival ink.  Stenciled A Crafter's Workshop mini burst at the bottom with acrylic paint.  Stamped piano keyboard image (Leavenworth Jackson) and embossed in black, roughly colored in keys with gel pen.  Stamped flourish (Stampabilities) along left side with Archival Ink. Rubbed, using my finger, Viva Inka Gold in old gold over the rustic paint stenciled areas and around the edges of the tag.  Computer generated some of the lyrics from the song 10,000 Reasons (Bless the Lord) by Matt Redman, cut them out, and glued them on... added shading with an All Stabilo pencil.  Tied on gold cording.  Colored some ribbon with Distress Paint, stamped it with music and tied it on.  Finished it off with a Prima music note clip.  


Monday, May 20, 2013

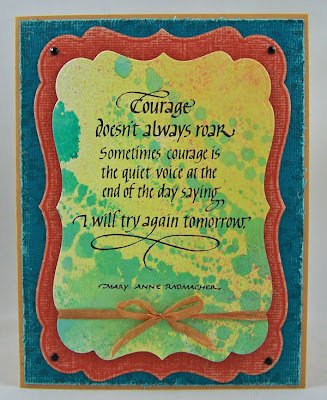
Courage

First, my heart goes out to all those effected by the recent storms.  You are in my prayers!!!


And now on to this card.  It's been in my drafts for quite some time and finally I can share it.  The quote is a stamp from Quietfire Design, you can find it HERE.  

I took a "mop-up" piece of cardstock... translation - a piece of paper used to pick up extra color from a craft sheet while working on a project.  This piece picked up excess from more than one project. 


I decided on an area for my quote and stamped it with Archival Ink jet black.  


Next I placed a Spellbinder's die over the paper, used a marked ruler to be sure the quote was straight and evenly spaced within the die, taped the die in place with removable tape and ran it through my Vagabond.


I tied a Distress Ink colored 4mm silk ribbon around the piece.  My layers are cut from Core'dinations Adirondack cardstock and distressed with a sanding block.  Four black, sticky-backed gems.  


Monday, May 13, 2013

I Couldn't Stand It

I blogged this house last week (the post is HERE if you didn't see it), and I said I used the large flourished heart but when it was finished I wished I had used the small one.  


Well it's been sitting on my counter and I would cringe every time I saw it because the heart was just too big, so I ripped the heart off as best I could, put new paste on and added the smaller heart and now it looks like this.  Much better!!!


Sunday, May 12, 2013

Distress Paint and Adirondack Blending Solution


So when I got done with the 6 x 8 canvas I had 3 flowers left over I hadn't used and thought I should.  

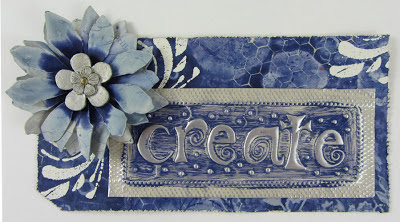
I also had 3 tags laying in my work area that I had been trying something out on and decided to use one of those.  These are the 3 tags.  The coloring is done with Distress Paints and Adirondack blending solution.  For the first tag I sprayed the tag with well with water, added salty ocean and wild honey DP, blended it a bit with my finger, dripped on blending solution (more like shook it from the bottle so it fell in drips), and dried the tag. *the paint needs to be wet when you drip on the blending solution and not too thick which is why the tag is sprayed with water*  For the second tag (and it's the one I decided to use) I painted the tag with weathered wood DP, let it dry completely, sprayed it with water, added chipped sapphire DP, and shook on the blending solution.  For the 3rd tag, I had used picked raspberry, let it dry, added salty ocean and wild honey, dripped on the blending solution and went, "duh, I forgot the water", tried to add water, didn't really work at that point, dried it, then sprayed with water, added weathered wood DP and dripped on the blending solution.   


To finish the tag, I stamped some Wendy Vecchi images.  The flourish is embossed with white powder that isn't a bright white.  The honeycomb is stamped with Adirondack pigment snow cap.  The edges of the tag are distressed using Tim's paper distresser.  "create" is embossed into Ten Second Studio metal using one of their molds and I used a wheel around the edge... sanded the raised areas, lightly brushed on chipped sapphire DP paint over the word keeping the paint mostly inside of the "wheeled area", dried it, sanded it again.  I used weathered wood and chipped sapphire paint on each of the flowers, heated and shaped each flower, stacked them together, made hole and put a small brad through them all, glued it to the tag and finally added a Blossom Bucket piece to the center.  Oh, I almost forgot.. I stamped Wendy's flower border image along the bottom right with snow cap ink before adding the metal piece - it kind of blends in but adds a nice extra detail. 


Saturday, May 11, 2013

6" x 8" Mixed Media Canvas


Another canvas swap with a small group of friends, this one was sent to Lori.  I totally loved this canvas when I was done with it - so much that I might have to make one for myself.  I also find that I really enjoy making canvases.
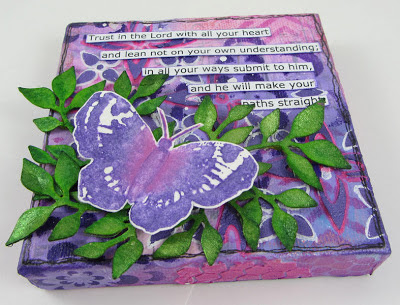
I began by stenciling leaves (Wendy Vecchi Studio 490) on the canvas with white embossing paste (Wendy Vecchi)... I stenciled one or two leaf stems, let them dry, did another one or two, let them dry, etc. until I had it covered.  Then I gessoed the whole canvas.  Next I sprayed it with water and then started adding Distress paint.... I either sprayed more water or blotted some off as I went whatever was needed to allow the colors to blend but not blend too much.  Let the paint air dry and it was beautiful but I wanted the colors to be a bit darker so I sprayed with water and added paint again just like the first time and let it dry.  Next I stenciled little circles (A Crafter's Workshop stencil - mini circle explosion) in between the leaves and on the sides of the canvas with a heavy bodies acrylic paint and let it dry.  Randomly stamped Wendy's text image with Archival Ink.  Used my finger to add Viva Inka Gold in old gold to the edges and over the leaves catching some of the high spots but also getting some on some of the low spots.  The flowers --  I used Glue 'n Seal to glue pages from an old Gregg Shorthand book to Wendy's Clearly For Art, enough to cut Tim's tattered floral's die 3 times.  Then I used Distress Paint to color the flowers and Archival Ink to stamp Wendy's small weed image along the edges of the petals.  Cut, heated, and formed the flowers. I added small holeless gold beads to the centers of the little flowers.  The leaves -- Another Wendy stamp.  I stamped 3 of them onto grungepaper, cut them out, painted them with Distress paint on both sides, stamped various Wendy backgrounds onto the leaves with Archival Ink, drew the black lines with a Pitt pen.  The words -- Wendy stamps again.  I painted manila cardstock with Distress Paint, stamped with Archival Ink and cut them out.  The butterfly -- Yes, another Wendy stamp.  I cut a piece of grungepaper large enough to stamp the butterfly on, painted it with Distress Paints, let them dry, stamped the butterfly with Archival Ink, and cut it out.  I also painted the back  


Below is the wonderful canvas I received from Trent!!!!  It's 8" x 10". 


Wednesday, May 8, 2013

Another Butterfly ATC


Another ATC made a couple weeks ago for our in-person swap.  Corrugated cardboard, embossing paste, sprays, gold mesh, a collage sheet butterfly, a piece of black wire for the antena, Sizzix die cut leaves, Tim Holtz die cut letters colored and Glossy Accents added to the top, Viva Inka Gold rubbed around the edges. 

Tuesday, May 7, 2013

Butterflies


Two more atcs made a couple weeks ago for our in-person swap.  Distress paints in the background.  Wendy Vecchi's leaf stencil with embossing paste and colored when dry, random text stamping in the background, Stubby Stampers flower peg stamp along the bottom embossed with Adirondack EP, and a butterfly postage stamp.

Sunday, May 5, 2013

Filled With Love and Laughter


I've used another of Quietfire's newest stamps from the Home - Congratulations set.  The house pieces are Wendy Vecchi Art Parts.  I painted the full house shape (it extends behind the triangle piece) with Distress Ink antique linen putting a couple of coats on the area that would be seen with the bricks.  After it was dry I used Wendy's brick stencil and stencil paste to add the bricks and let it dry.  I then laid the stencil back on and painted the bricks with Distress Paint picked raspberry, removed the stencil and let the house dry.  For both the rafter/overhang piece and the triangle piece (oh, and I'm sure I don't really have these pieces put together right as with a house the triangle piece would not be on top of the overhang) I first coated them with Adirondack pigment ink snow cap, let that dry and then put Distress Ink vintage photo over it and let it dry... then I decided I didn't really want to go that way and painted the overhang piece with picked raspberry DP and for the triangle I thought it'd be really cool to add a Quietfire flourishing inside heart embedded in embossing paste.  I stamped the larger heart with Archival Ink magenta hue onto a scrap of manila card (now that it's finished, I wish I had used the smaller heart) and cut it out.  I mixed antique linen DP with some white paste, smeared it on the triangle, pressed the heart into it and added texture to the paste with the end of my pallet knife.  May your home be filled with love is stamped onto manila card, edged with magenta hue ink and then roughed up with the Distressing tool.  The on-the-edge fence was cut from manila card, painted with snow cap Distress Paint and inked a bit with vintage photo DI.  The flowers are yellow paper flowers with a bit of ripe persimmon DI sponged on and Liquid Pearls copper for the center.  The leaves are a Punch Bunch punch. 


Another 4x4 Mixed Media Canvas


I had so much fun making the last canvas (This post) that I immediately set about to make another one as a birthday gift for a sweet girl that turned 18 last month.  I've used embossing paste, A Crafter's Workshop stencils, various acrylic paints, a Sizzix leaves die, a butterfly stamp from Quietfire Design, white and black Sharpie paint markers, and the scripture is computer generated.  


Saturday, May 4, 2013

Angels Unawares


Quietfire Design has a new set of stamps called Home - Congratulations and they are currently 25% off.  This tag uses one of the stamps.  I put Distress Stains picked raspberry and squeezed lemonade on my craft sheet, sprayed on a little water and dipped the tag in it swirling a bit, dried it, dipped it again in the left overs (no swirling), blotted some of it off, dried it again, wiped up the craft sheet, lightly dabbed squeezed lemonade on the craft sheet several times (this made lots of little dots of color), pressed my tag straight down on the dots, picked it up, dried it, flicked on some water, blotted the tag and dried it.  I stamped the quote with Archival Ink jet black and dried it.  Stamped the small butterfly (Butterflies/Dragonflies set of stamps) here and there on the tag with Distress Ink spiced marmalade and dried it.  Repeated stamping but this time with Distress Ink picked raspberry.  Colored a scrap of manila card with spiced marmalade and squeezed lemonade stain, dried it, stamped the butterfly with picked raspberry ink, dried it, cut it out, went around the edge with a black Pitt pen, added pearls to the center and attached it to the tag with foam mounting tape.  Cut the butterfly on the edge die from manila card, trimmed it to fit, colored the butterflies with picked raspberry stain, both sides, dried it, inked around the edges of the butterflies with vintage photo ink, attached it to the tag with double stick tape along the bottom and foam mounting tape behind the butterflies to give some dimension and added the pearls.  Colored the ribbon with picked raspeberry and squeezed lemonade stain.  


Gingko Biloba


Some atcs made for a recent in-person swap.  The backgrounds are all cut from a mop-up piece I had... probably a few layers of Dylusion sprays.  The leaves and words are a set of Quietfire Design stamps.  I embossed the leaves with Stamp Zia's black sparkle embossing powder (there is just a little sparkle which was perfect), added water inside, let it sit and blotted it up to remove color and then colored them in with green.  The words were stamped with Archival Ink jet black.  A Pitt pen for the black doodling on the border and a white gel pen for the white line and dots. 


One day.... began.


 A journal page!!  It was fun!!  I don't have any background in painting but am interested and am starting to venture.  I thought I'd try to do a flower and I further challenged myself to use the Distress Paint applying it using the dabber top, not a brush.  I did pull in a finger now and then to remove paint such as when I was making the stem and got green on the flower because it was too difficult to get that little spot by the flower with the dabber top.  Otherwise the flower and the orange around it were done completely with the dabber top.  The diamonds are a Wendy Vecchi stencil and I started using the dabber top and switched to my finger for less bleeding under the stencil.  I used a Stabilo pencil to add definition to the edge of the flower and one side of the stem and leaf and a white gel pen for the other side of the stem and leaf and on the border.  The quote was written with a Pitt pen.  I'm rather pleased with my first freehand painted flower.  Distress Paint used... picked raspberry, spun sugar, mustard seed, vintage photo, mowed lawn, bundled sage, black soot.