Monday, February 2, 2015

PaperArtsy Lin Brown Launch Day


Back on THIS blog post I shared little snippets using new PaperArtsy Lin Brown stamps and now you get to see the whole projects.  

You must go over to the PaperArtsy Blog and see all the launch posts this week.  They started yesterday with the paint post and run all the way through Saturday.... Sooo Exciting!!!!  The direct link to the post focusing on the new Lin Brown releases is HERE and it includes a wonderful video that I'm also embedding on my blog.....


All the new PaperArtsy products have shipped to retailers and can be purchased right away.


I created 4 projects using stamps from Lin's new sheets ELB15 amd ELB16.  I knew as soon as I saw the large flower image and the quote that I wanted to make a garden and it was the first thing I created.  The base is heavy snoothy card and is sized 8" x 8".  The flowers are stamped on the base and also twice each on smoothy card.  For some of them I painted the smoothy card before painting and others I painted after stamping.  I also stamped an extra bottom part for each onto smoothy. For each flower I cut out one whole flower, then I cut out just the bottom with the front flower petals, and then finally just the bottom which means there are 3 layers for each flower and then they are glued to the background. 


So as not to make this post too long and because there are others sharing samples with new Lin stamps (see them all on the PaperArtsy blog - linked above) I will just show one pic of the other 3 samples for now and will get more detailed with them over the next couple of weeks.


Sunday, February 1, 2015

Art Journal Spread using PaperArtsy New Paint Colors!!


Today is the start of 7 days of new product launches on the PaperArtsy Blog.  This first day focuses on their line of Fresco Finish paints!!!!  There are new yummy colors!!!!  I've already had a chance to play with some of them and created these pages in my art journal.  

I gessoed the page first, tore some music tissue wrap in pieces and glued them on with gel medium and used my fingers to paint on the new colors smurf and wisteria.  I stenciled the flowers along the bottom and the word bloom (PS008) with grunge paste. Next I did a glaze by mixing lavender with matte glaze about 1/2 and 1/2, brushed it over the flowers and word, waited a minute and used a baby wipe to rub it off.  I decided it wasn't dark enough so repeated that with blueberry mixed with matte glaze.  I used my finger to rub the new bougainvillea over the flowers, decided it wasn't bright enough so went over the flowers again with snowflake and then bougainvillea so the bougainvillea would pop.  The centers of the flowers and some of the extra dots have the new color banana on them.  I stamped the 3 large flowers (a new Lin Brown stamp) on the page with Archival Ink jet black and also stamped them on a book page.  In the background I've stamped a couple of new Sara Naumann stamps, one (the lines) with the new color blue oyster and the other (writing) with Archival Ink.  I painted on stems and stenciled the leaves (PS002) with hyde park.  There is also some hyde park along the bottom added with my finger.  "wherever you are planted" is from Darcy's stamp set EDY07.  I painted the flower on the book page with banana and tangerine twist, cut them out, and glued them over the stamped flowers. Rubbed some snowflake paint around the edges and then doodled with a Posca marker. 


Thursday, January 29, 2015

Love Mends, Heals, Saves


There is a new challenge in town.... ok, it's been around for a few weeks, but since it's a monthly challenge it's still the very first one.  It is the Make ART Challenge featuring Art by Wendy Vecchi.  The first challenge is to use Embossing Paste on your project and I'm just getting in under the wire.  The only other rule each month is to use at least one Wendy Vecchi product.  

Be sure and pop over to the challenge site to check out Wendy's project along with it's directions.

I started with the heart and really thought I was going a different direction with this but wound up making an art journal page.  This book is 5 1/2" x 8 1/2".  The heart and also the word love are Wendy Vecchi Art Parts.  On the heart I first used Wendy's black paste and let dry.  Over that I used the crackle paste, applied rather thick on some it and let that dry.  I then used my finger to add an area of white paste to symbolize the cracks starting to mend.  After that was dried I sprayed on some Distress, blotted and dried it and then decided to just sponge on some of Wendy's Archival Ink red geranium.  I sponged the whole heart, dried it, and then sponged on another layer and dried it.  I dabbed white paint on the top of the word love, dried it and then used my finger to dab Wendy's gold embossing paste over it.  I also added some of the gold embossing paste around the edges of the heart.  When love was dry I dabbed on another layer of gold and dried it.  I tied white ribbon around the heart and glued on love.  The words Mends, Heals, and Saves are made with a dymo label maker (I haven't had that out in awhile).  For the background I just sprayed on a big of Distress stain spray, inked around the edges with Distress Ink and wrote out the scripture.  There is also some shading around the heart. 


Tuesday, January 27, 2015

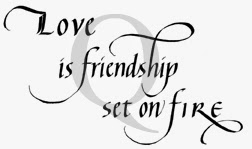
Love is friendship...


Quietfire has a new set of stamps called Love -Fill 'er Up.  I've used just the letter L from that set and combined it with an older stamp, Love is friendship.  The finished card is 5" x 7". 


For the background I've used Fresco Finish paint and alcohol.  Along the bottom I've stamped the large horizontal flourish, standing it vertical, with paint.  The flame is a TCW stencil that I've stenciled with paint onto a scrap and cut out.  Paint and sticky back hearts highlight the large L and a bit of Treasure Gold florentine is around the edges.


Monday, January 26, 2015

Winner!!!!

Good Morning!!!  

Thank you so much for all the wonderful comments on my heart project.  I quite like it also and found a great place to hang it.  

Here is the winner on my blog for the Queen of Hearts blog hop.  

Lynn c said...
Just beautiful! My favorite colors to use when making cards. Flowers on any projects just completes the project. ☺

Thursday, January 22, 2015

Quietfire Queen of Hearts 2015 Blog Hop

Welcome to the Quietfire Design Queen of Hearts Blog Hop!

Here is my contribution!


My base is 140# watercolor paper.  I created a pattern from copy paper the old fashioned heart making way - fold the paper in half and cut a heart :-)  I took the pattern, laid it on the watercolor paper, drew around it with a pencil, tore out the heart following the line as best I could while tearing, and erased any pencil marks left on the paper.  I created a resist by sponging Golden's gel medium matte through a stencil (TCW), dried it and sprayed the heart with Distress stain sprays.  I blotted up the excess stain, dried the heart, used my finger to pick up extra stain from my craft sheet and added it to the edges of the heart to darken them.  I stamped and embossed the quote (minus the heart at the top) onto the heart.  I stamped the heart on a scrap of white card, tore it out in a heart shape, added dots with a Posca marker and added it to the heart on an Idea-ology memo pin.  The leaves are cut with a die (Memory Box), sprayed with Dylusions, and stamped with a script stamp.  The flowers are made from copy paper - punch flowers, stack them up (I used 5-6 for the small flowers and 8-9 for the large), put a brad in the center, crumple them petal by petal to the center and then pull them back out.  To color, I sprayed some water on the flower, picked up Distress stain spray with a paint brush and dabbed the edges of the flower petals. The hanger is crinkle ribbon colored with Distress stain sprays.  


All the projects for the hop are fabulous and, if you've missed any, I encourage you to go back and see them.  Here is our Blog Hop Schedule and the dates each designer has or will be posting (Click on each person's name to go to their blog):

Jan 19 - Kathy Jo and Diana
Jan 20 - Sherry and Yogi
Jan 21 - Yvonne and Teresa 
Jan 22 - Wanda and Robyn
Jan 23 - Suzanne 


For a chance to win a Quietfire rubber stamp (Don’t be shy!) leave a comment below before midnight Sunday January 25th, 2015. A winner will be randomly chosen from my list of comments and the winner's name will be posted on Quietfire Creations shortly afterwards. If you haven't done so already, go back and leave comments on all the designers Queen of Hearts blog posts!


Thanks for stopping by!!!


Monday, January 19, 2015

More Snippets

Hello!!!!  I'm sharing more snippets of projects for PaperArtsy.  This time I'm using some of Sara Naumann's new stamps.  Remember PaperArtsy is announcing new product on their blog beginning Feb. 1 for 7 days.  Sara's stamps will be part of the launch post on Feb. 4th.  


Sunday, January 18, 2015

The 2015 Quietfire Design Queen of Hearts Blog Hop

Starting Monday is the annual Quietfire Design Queen of Hearts Blog Hop!

The hop is happening much earlier than usual so you have time to get your Quietfire stamps and start creating!!

There are nine designers this year, so most days you will be visiting two blogs.  There will be projects you can use for Valentine's Day or weddings or just for someone you care lots about.

Of course there are prizes!  Leave a comment on each of the Queen of Hearts Blog Hop posts and you will be eligible for a rubber stamp prize from that blog.


Here is the Blog Hop Schedule and the dates each designer will be posting (Click on each person's name to go to their blog):

Jan 19 - Kathy Jo and Diana
Jan 20 - Sherry and Yogi
Jan 21 - Yvonne and Teresa 
Jan 22 - Wanda (that's me) and Robyn
Jan 23 - Suzanne 

Friday, January 16, 2015

Have a Heart that never hardens...


I'm over on the Quietfire Creations Blog today with a tag using the new "Have a Heart that never hardens" stamp.

Wednesday, January 14, 2015

Poppin' In


I am hoping to do more posting to my blog this year overall but things are a little slow right now as I'm working on samples for PaperArtsy that I can't share yet.  In February there is a big trade show in the UK much like CHA is in the US and PaperArtsy has their biggest new release of the year at that show.  They will also be showcasing all the new releases on their blog beginning February 1st and running for 7 days, focusing on different collections each night.  

I can show little snippets here and so I'm sharing from samples I've finished using some of the new Lin Brown stamps.  Lin's stamps will be featured on Feb. 2nd and you'll be able to see the complete projects then, and, yes, I'll remind you!!!!


Saturday, January 3, 2015

Take a moment to embrace today


Happy Saturday!!!  I hope you are having a good weekend!!!

The background of this card has a few layers as things weren't coming together as I had hoped.  When it didn't work at first (and I almost threw it away) I didn't really keep track of all I did.  I used Fresco Finish Paints and also some brushos.  On top of that I stamped the sketchy rectangles image (PaperArtsy Ellen Vargo #07) with Archival Ink French ultramarine.  The stem/leaves and flower are PaperArtsy Lin Brown stamps from set #01.  I stamped the stem/leaves with embossing ink and embossed with Wendy Vecchi's fern green powder.  The flower is also stamped with embossing ink and then embossed with Wendy's tree branch.  I used a Ranger craft nib to add Archival Ink (fern green, orange blossom) over the embossing to create depth and shadows.  I stamped the saying (Lin Brown #06) with Archival Ink jet black and also inked the edges of the panel.  I stamped part of a spotty PaperArtsy Sara Naumann image (set #09) around the flower and quote using FF paint and then also used a small paint brush to splatter around some watered down FF paint, both snowflake and little black dress.  In the center of the flower I added a Finnabair metal piece that I'd colored with Treasure Gold onyxite, heated and buffed to a beautiful shine and also a blue brad.  The twine was white and I added colore with Archival Ink orange blossom.  Everything is layered to a folded white card. 

Even though the background started out bad I really like how it all came out!!!!!


I'm linking to The Mixed Media Card Challenge #7.  The theme is "new".  This card fits the theme as I just got the Brushos for Christmas and it was my first time trying to combine acrylic paint and Brushos - something I haven't given up on but I definitely need to play more!!

Friday, January 2, 2015

Have a Heart....


Here's a quick card using another of Quietfire's new stamps, Have a Heart That Never Hardens.  I stamped the quote with Archival Ink magenta hue onto white cardstock, die cut it with a Spellbinder's die (Long Classic Scalloped Rect. Lg) and ran it through again to get that wonderful embossed edge.  The border image is a Spellbinders Edgeabilities (Classic Petal).  I cut the edge and hearts from white, inked it with magenta hue and then layered it to the white that was left - trimming the top, bottom and left to size.  The background is printed paper (possibly Bo Bunny but it was a partial piece and not marked - I have a LOT of printed paper collected over the years and I'm hoping to put a dent in it this year).  I wrapped the hole thing with twine on the left and layered it to a folded white card, 5" x 7".  Finally I added some diamond Stickles to the heart and along the pink decorative edge.


Thursday, January 1, 2015

Happy New Year, A simple Card, An announcement

Happy New Year!!!  I hope your 2015 is filled with God's blessings!!

The announcement you say..... I am officially back on the Quietfire Design design team.  Woo-hoo!!!!  I've played along in several of the hops QF has done this past year and did a couple of guest but didn't rejoin the team.  I believe I'll have the time now to be consistent with them.  Thanks to Suzanne for taking me back (vbg - she's been waiting for me to come back)!!!

 I have brand new QF stamps to play with and here is a quick card showing one of them.  You can see all 4 of the new stamps HERE.  

I cut a piece of white cardstock to 4" x 5/14", stenciled the heart (The Crafter's Workshop) with Distress Inks mustard seed and picked raspberry, and stamped the quote with Archival Ink jet black.  I had not intended to tear the corners but I had used some tape with the stencil, not so much as to hold it in place but to mask off the heart next to this one, and when I took off the stencil I tore the piece... so, I made it work.  LOL   


The background piece... I sponged the same colors around another piece of white cardstock (4 3/4" x 6 3/4"), flicked it with water, stamped a background image across the center and a border image at the top and bottom (both Wendy Vecchi stamps).  This is all layered to a folded 5" x 7" card.  The main image is attached with foam mounting tape.


This quote makes me think about the biggest, greatest, best love there is... God's love!!!  And when we realize that love completely, it really does change our lives in amazing ways!!


I'm linking up to...


Tuesday, December 30, 2014

Pleasant Words Journal Page


This journal is 5 1/2" x 8 1/2" and I'm filling it with art and scriptures.  This is such an important verse and something I really need to work on... pleasant words to everyone (including my teenagers - not always easy).  I've used PaperArtsy Fresco Finish Paints, Wendy Vecchi's honeycomb stencil, PaperArtsy Jofy stamp images (heart and flower from set #22), a Tim Holtz rub on (pointed finger), Posca pens, and the verse is computer generated.